Exercises to Bulletproof Your Shoulders

We hope you enjoy reading this blog post. Ready to upgrade your body? Download the app
By Mofilo Team
Published
That little pinch you feel at the bottom of a bench press isn't random. It's a warning sign. This guide gives you the exact exercises to bulletproof your shoulders, focusing on the small stabilizer muscles that prevent injury and unlock your true pressing strength.
Key Takeaways
- Bulletproof shoulders require balancing your “push” muscles with the small, stabilizing “pull” muscles of the rotator cuff and upper back.
- The goal is not lifting heavy weight; it's controlling very light weight (like a 5 lb dumbbell or resistance band) for 15-20 perfect reps.
- Perform a 5-minute version of this routine before every upper body workout to activate key stabilizers and prevent impingement.
- The single most effective exercise for shoulder health is the face pull, as it strengthens rear delts, traps, and external rotators simultaneously.
- Immediately stop doing upright rows and behind-the-neck presses, as they put the shoulder joint in a position that guarantees impingement over time.
- You should feel a difference in stability during your main lifts within 2-3 weeks of consistently performing these exercises.
What “Bulletproof Shoulders” Actually Means
The best exercises to bulletproof your shoulders have almost nothing to do with pressing heavy weight overhead. It’s about fixing the dangerous muscle imbalance that all that pressing creates. If you feel a tweak, click, or pinch in your shoulder when you lift, it’s your body telling you this imbalance has gone too far.
Think of your shoulder muscles in two teams. Team Push (your chest, front delts, and triceps) and Team Pull/Stabilize (your rotator cuff, rear delts, and mid-back muscles like the traps and rhomboids).
Most gym routines are 80% Team Push. Bench press, incline press, overhead press, push-ups. We love these exercises because we can see the muscles in the mirror. The result? Your front-facing muscles become strong and tight, while the muscles in the back that hold your shoulder joint together become weak and stretched out.
This is like building a 500-horsepower engine for a car but keeping the stock lug nuts on the wheels. Eventually, the power from the engine will rip the wheels right off. Your strong pecs and delts are the engine; your weak rotator cuff muscles are the lug nuts. The “bulletproofing” process is simply about tightening those lug nuts.
Your rotator cuff is a group of four small muscles that wrap around the head of your humerus (your upper arm bone), keeping it centered in the shoulder socket. When they are weak, the powerful front delts and pecs pull the humerus forward and upward, pinching the tendons underneath. That’s the sharp pain you feel.
Bulletproofing isn't about adding more armor. It's about creating balance so the joint moves correctly and painlessly under load.
Stop letting your shoulders hold you back.
Track these exercises. See your pressing strength increase safely.
Available on iOS and Android
Why Your Current Approach Is Failing
You're probably already trying to fix this, but what you're doing isn't working. It might even be making it worse. Most people fall into one of four traps.
Trap 1: Only Doing Heavy Presses
You think, “My shoulders are weak, so I need to overhead press more.” This is like noticing your car is pulling to one side and deciding the solution is to accelerate harder. Heavy compound lifts like the Overhead Press (OHP) are fantastic for building your deltoids, but they do very little for the tiny rotator cuff muscles. In fact, they just strengthen the dominant muscles, worsening the imbalance.
Trap 2: Doing the Wrong “Prehab” Exercises
You saw someone on Instagram doing dumbbell external rotations with a 20-pound weight, swinging it wildly. This is useless. When the weight is too heavy, your bigger, stronger deltoid muscle takes over completely. The small rotator cuff muscles you’re trying to target never get a chance to work. For these exercises, a 5-pound dumbbell is often too heavy. A light resistance band is your best tool.
Trap 3: Ignoring the Pain Signal
That sharp “pinch” is not a sign of a good workout. It’s a sign of shoulder impingement. It means a tendon is literally getting pinched between bones inside your shoulder. Pushing through this pain is like continuing to drive your car while a warning light is flashing on the dashboard. You are actively causing damage that will eventually lead to a more serious injury.
Trap 4: A Bad Warm-Up
A few arm circles and swinging your arms around for 30 seconds does nothing to activate the specific muscles that stabilize your shoulder joint. A proper warm-up for an upper body day needs to target the rotator cuff and scapular muscles directly. It's about waking them up and reminding them to do their job before you ask them to support a 225-pound bench press.
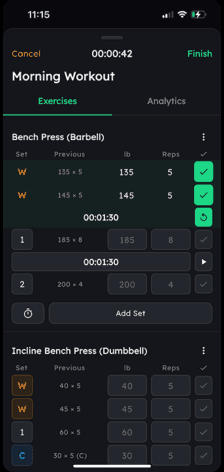
Your progress, tracked and proven.
Every prehab set logged. Proof your shoulders are getting stronger.
Available on iOS and Android
The 3-Part Shoulder Bulletproofing Protocol
This is your new blueprint. Perform this routine 2-3 times per week. You can do it as a standalone workout on a rest day, or use the shortened version as a warm-up before every upper body session. The key is light weight and perfect, controlled form. Your ego has no place here.
Part 1: Rotator Cuff Activation
This targets the muscles that keep the ball in the socket.
- Exercise 1: Banded External Rotation: Loop a light resistance band around a rack post at elbow height. Grab it with your far hand. Pin your elbow to your side-do not let it flare out. Now, keeping your elbow locked in place, rotate your forearm outward against the band's resistance. Squeeze for one second at the end. Control the movement back to the start. Do 2 sets of 15-20 reps. The weight should feel almost too easy.
- Exercise 2: Banded Internal Rotation: Turn around and grab the same band with your inside hand. Keep your elbow pinned to your side. Now, pull your forearm inward across your stomach. Control the movement. Do 2 sets of 15-20 reps.
Part 2: Scapular Stability
This teaches your shoulder blades to move correctly, providing a stable platform for your arm.
- Exercise 3: Scapular Wall Slides: Stand with your back against a wall. Place your forearms on the wall in a “goalpost” position, with your elbows bent at 90 degrees. Slowly slide your arms up the wall, trying to get them overhead without your lower back arching or your elbows leaving the wall. Go as high as you can with good form, then slide back down. Focus on the feeling of your shoulder blades moving. Do 2 sets of 10-12 reps.
- Exercise 4: Scapular Push-ups: Get into a push-up or plank position with your arms straight. Without bending your elbows, pinch your shoulder blades together, letting your chest sink toward the floor. Then, push them apart as far as you can, rounding your upper back. That’s one rep. The only thing moving should be your shoulder blades. Do 2 sets of 15 reps.
Part 3: Upper Back and Rear Delt Reinforcement
This builds the muscles that pull your shoulders back and down, counteracting the forward pull from sitting and pressing.
- Exercise 5: Face Pulls: This is the most important exercise in the entire routine. Set a rope attachment on a cable machine at chest height. Grab the ropes with an overhand grip, thumbs pointing back at you. Step back. Pull the ropes toward your face, aiming for your eyes. As you pull, drive your hands apart and externally rotate your shoulders, finishing in a double-bicep pose. Squeeze your rear delts and upper back hard. Do 3 sets of 15-20 reps.
- Exercise 6: Band Pull-Aparts: Hold a light resistance band with both hands, palms down, about shoulder-width apart. With your arms straight out in front of you, pull the band apart by squeezing your shoulder blades together. Imagine trying to rip the band in half. Keep your arms straight. Control the return. Do 3 sets of 20 reps.
How to Integrate This Into Your Training
Knowing the exercises is useless if you don't have a plan to implement them. Here are two simple options. Pick one and stick with it for at least 6 weeks.
Option 1: The 5-Minute Pre-Lift Activation (Best Choice)
This is the most efficient way to protect your shoulders. Before every single upper body workout (chest, back, or shoulder day), do this exact sequence:
- Wall Slides: 1 set of 10 reps
- Band Pull-Aparts: 1 set of 20 reps
- Banded External Rotations: 1 set of 15 reps per arm
- Face Pulls: 1 set of 20 reps
This takes less than 5 minutes. It doesn't fatigue you for your main lifts. It just wakes up the right muscles so they are firing and ready to stabilize the joint when you start pressing heavy.
Option 2: The Full Accessory Workout
If you have more time, or prefer to do this on an off-day, perform the full routine from Section 3. Do all the prescribed sets and reps for all 6 exercises. This works well at the end of a workout or on a dedicated recovery day, 2 times per week.
What to Expect:
You will not feel a “pump” from these exercises. You will feel a deep, sometimes burning sensation in small muscles you didn't know you had. That's a good sign.
- Weeks 1-2: You'll feel more “connected” to your shoulders. The movements might feel awkward at first.
- Weeks 3-4: You should notice a clear reduction in clicking, popping, and pinching during your main lifts. Your bench press and OHP should feel more stable and powerful at the bottom.
- Weeks 6-8: The feeling of vulnerability should be gone. You'll feel confident pressing heavy weight because you've built the structural integrity to support it.
Progression is not about adding weight. It's about adding reps. Once you can hit 20-25 perfect reps, you can increase the band tension slightly. The weight must always feel light enough for perfect control.
Frequently Asked Questions
What exercises should I avoid for shoulder health?
Immediately stop doing upright rows and behind-the-neck presses. Both movements combine internal rotation with abduction (lifting the arm out to the side), which is the exact mechanism of shoulder impingement. They grind your rotator cuff tendons down with every rep.
My shoulder clicks but doesn't hurt. Is that bad?
A painless click or pop is often just a tendon moving over a bone or air releasing from the joint. It's not an emergency, but consider it a yellow warning light. It signals some instability is present. Start this bulletproofing routine now to fix the root cause before it becomes painful.
Can I just do face pulls and nothing else?
If you are extremely short on time, doing 3-4 sets of face pulls is the best bang for your buck. It addresses rear delts, external rotation, and scapular retraction, covering about 80% of the bases. It is infinitely better than doing nothing. However, the full routine is optimal for complete joint health.
How do I know if it's a real injury vs. just soreness?
Muscle soreness is a dull, widespread ache that you feel 24-48 hours after a workout. Joint pain is a sharp, stabbing, or pinching feeling that happens *during* a specific movement. If you feel sharp pain, stop the exercise immediately. If the pain persists for more than a week, it's time to address it more seriously.
Conclusion
Building bulletproof shoulders isn't about a single magic exercise. It's about consistently strengthening the small, neglected muscles that support the joint. Stop thinking about adding more weight and start thinking about creating more balance. Start with the 5-minute activation routine before your next workout and feel the difference for yourself.
All content and media on Mofilo is created and published for informational purposes only. It is not intended to be a substitute for professional medical advice, diagnosis, or treatment. Always seek the advice of your physician or other qualified health provider with any questions you may have regarding a medical condition, including but not limited to eating disorders, nutritional deficiencies, injuries, or any other health concerns. If you think you may have a medical emergency or are experiencing symptoms of any health condition, call your doctor or emergency services immediately.